New Feature – Move pages and categories with drag & drop

Another quick update today: we’ve now added the ability to quickly move pages between categories, as well as moving categories themselves.

Move pages

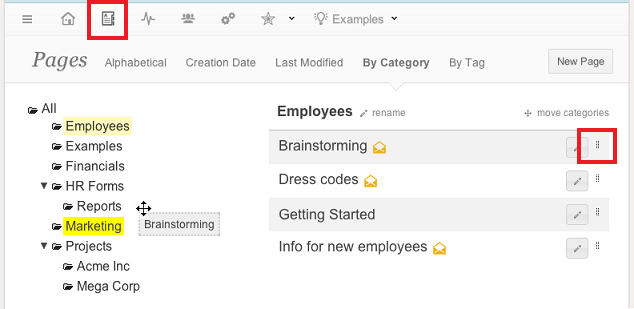
To reorganize your pages and categories, go to the Pages overview, and select By Category. You’ll now find a little drag handle on the right side of each page. To move a page to another category, just drag the page by its handle, and drop it on one of the categories in the category tree on the left. Note that users can only move a page if they are the creator of the page, or an administrator.

Move categories

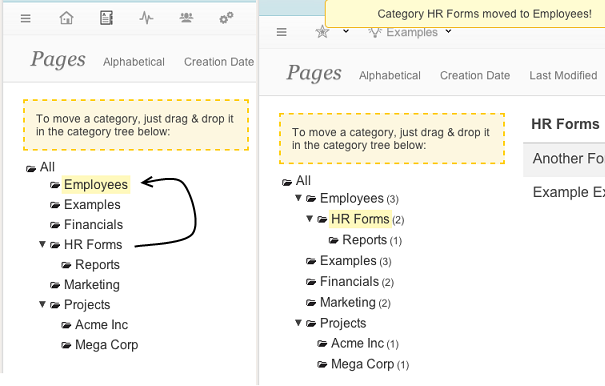
We’ve also made it easier to quickly re-arrange your category structure, without having to change the category for each page individually. In the Pages – By Category overview, click the “move categories” link (note that this option is only available for administrators). You can now drag a category in the category tree, and drop it onto another category. For example, we can move the “HR Forms” category to the “Employees” category: all pages and sub-categories of HR Forms are now moved to Employees.

Moving a category - example

We hope you like the new feature, more soon!

New Feature — Tags

Today we’re introducing another way to organize your pages: tags. With categories you can already hierarchically structure your pages, just like folders on your PC or Mac. Sometimes however, you might want to group, search and browse pages by additional keywords. This is where tags come in. You can assign multiple tags to each page, so that allows you to browse and find pages by all kinds of keywords. For example, you could add tags to describe some status, responsibility, status, type of document, and so on.

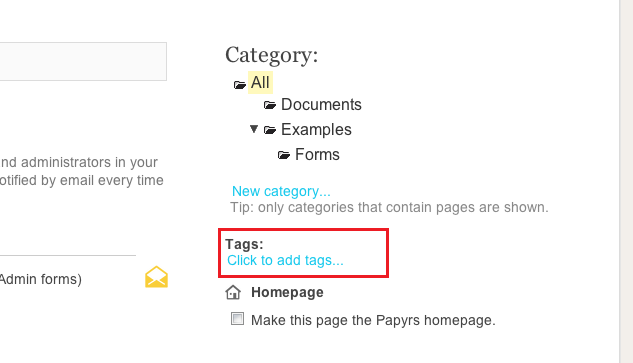
To add tags to a page, go the page’s Page Settings, and click the add tags link:

Click to add tags

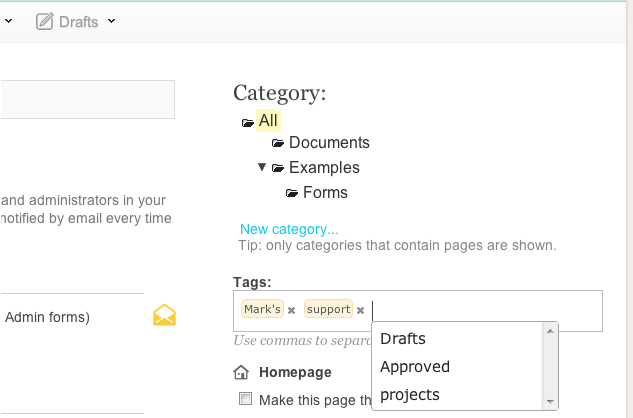
Just enter a list of tags, separated by commas, or select existing tags from the dropdown menu.

Edit tags

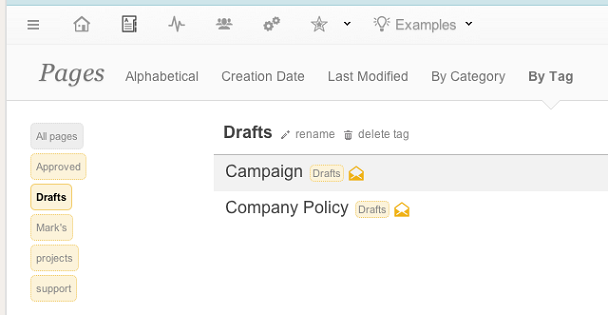
You can browse tags by pages under the Pages Overview:

Pages Overview, by Tag

Administrators can also delete and rename tags. Note: unlike categories, which are only visible if a user has access to at least one of its pages, all tags are visible to all users in your team. As always, the pages within the tags are of course only visible to people who can access them.

Just like categories, you can also pin a collection of pages with a certain tag to the menu bar. Just go the menu editor, and add a Tag Menu.

Tags menu

We hope you like the new tags feature, more is coming soon!

Papyrs – New Feature – Reply By Email

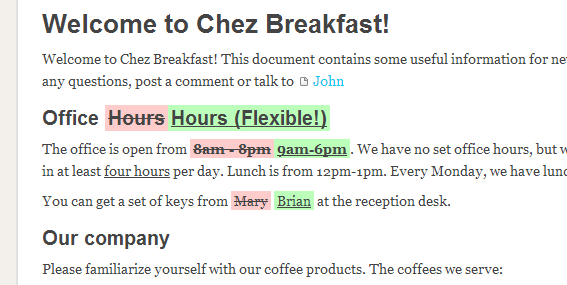
Collaboration is about communication, and at least for the time being, communication is all about email. So Papyrs sends email notifications to keep everybody in your team up to date. We send emails when a new form is submitted, when a page is modified, when people discuss something via a Discuss widget ans so forth. This is great because it allows you see what other people in your team are up to from your PC, Mac or mobile phone in a glance. We even highlight changes made to a page (it’s a huge time saver!)

Often you don’t just want to read what’s going on, you want to actively contribute to the conversation. Up till now you had to click on a link in the email that would take you to the Papyrs page. And then, on the Papyrs page you could take part in the conversation. This approach has a number of downsides:

  1. Guests and casual users of Papyrs may not want to log in just to reply to an email,
  2. or they may have forgotten their password,
  3. or they may be on a slow mobile device and therefore can’t easily get to Papyrs.

The solution — reply-by-email

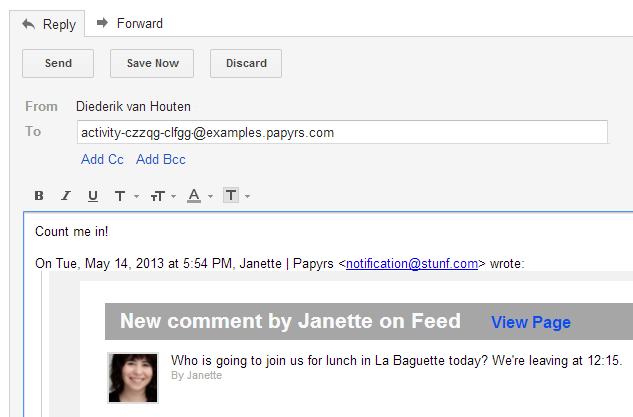
So from now on you can reply to Papyrs activity notifications directly from your email client:

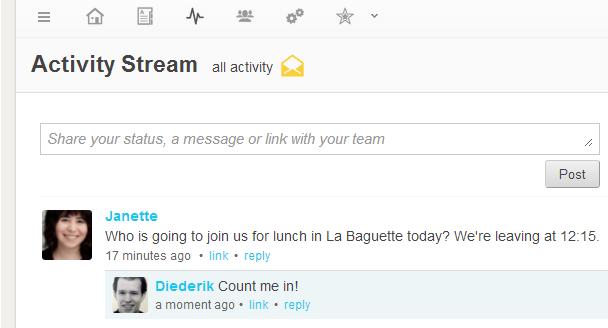
Hit send and in just a moment the activity feed will be updated so everybody knows you’re going to join the rest for lunch:

This happens completely automatically. Papyrs will analyse the email you send. Figure out who you’re replying to. Create a Papyrs comment in the activity stream. And finally, Papyrs will notify everybody who has elected to receive email updates with your new email message. It’s completely automated and it happens in seconds!

So collaborating with Papyrs has never been easier! You don’t have to be logged in to take advantage of this feature, because you’re already logged in to your email software. That takes care of the first problem and second problem. And since email works great on mobile phones and tablets problem 3 is also taken care of.

That’s it for today. Thanks for reading and for using Papyrs. Not using Papyrs yet? Why not give the free trial a spin?

More updates soon!

New Papyrs version: Customizable Menu Bar and more!

Today we’re launching a big version upgrade for Papyrs. An important part of storing and sharing information within your company or organization is navigation, to make sure everybody can quickly find what they’re looking for. Papyrs already had a powerful find-as-you-type search, and navigation widgets allowed you to add table of contents, links to other pages and category tree controls to a single page. We’re now launching a fully customizable global menu bar.

With the menu bar you can easily add global navigation to your Papyrs intranet site. Because the menu bar is global, you only need to create the menu once, and the navigation is automatically available from every page. This is a great way to link to pages you use frequently, but you can also add all kinds of other (external) links, or add hierarchical navigation using drop down menus.

Menu Editor
Like editing pages, we wanted to make sure everyone can build their own custom menus without the need for any technical knowledge. That means no scripts, markup codes or configuration. To make this work we built a new custom menu editor. Like the page editor, you can create your own designs by just clicking and dragging building blocks in the editor. We wanted to find the right balance between flexibility and keeping things easy to use and simple, so we introduced the following building blocks you can add to the menu bar:

  • Page Links
    link to a page
  • Links
    links to an (external) URL
  • Categories
    add a category and its pages as a dropdown menu
  • Custom Dropdown Menus
    add a dropdown menu, to which more Page Links and Links can be added
  • Internal Navigation
    add a button to access standard functionality like the All Pages overview or the Activity Stream

Links to pages and categories a user cannot access are automatically hidden.
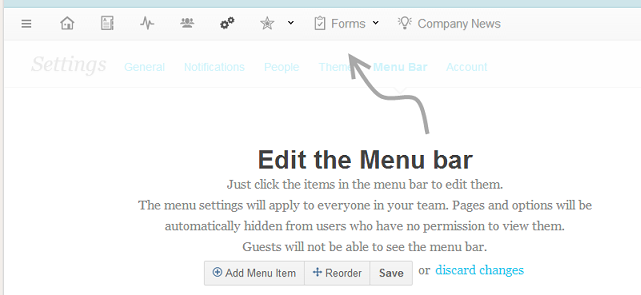
You can access the menu editor under Settings > Menu Bar.

More Menu
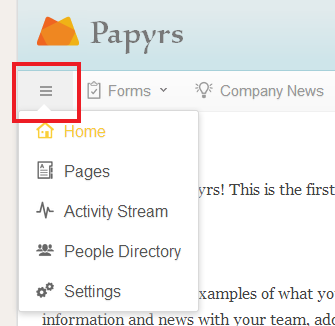
By default, the new menu bar contains the same navigation buttons as the old menu buttons (Home, All Pages, Activity Stream, People Directory and Settings). Because all buttons can now be modified or removed, we’ve added the More Menu, to make sure you can always access all standard functionality. The More Menu is always the first item on the menu bar.
More Features..

We’ve also added a couple of other features over the last few weeks:

Custom Form Submission Message
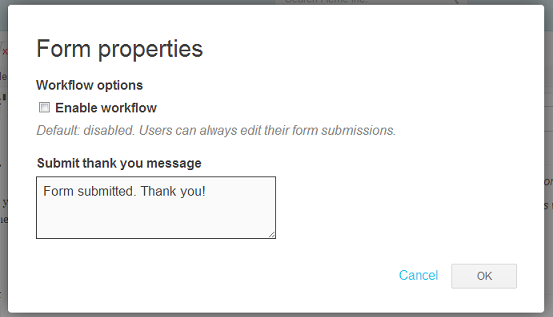
You can now customize the Thank You message when someone submits a form. To change the message, edit the page (Page > Edit Page), and edit the widget with the Submit button. You can then set the message in the dialog (shown below):
Auto-save draft
If you’re working on a new draft, or editing an existing document, Papyrs will now periodically auto-save your changes to the draft. As before, when you’re done editing the draft, just click Save to publish the changes (or discard the draft to cancel the changes).

User Impersonation
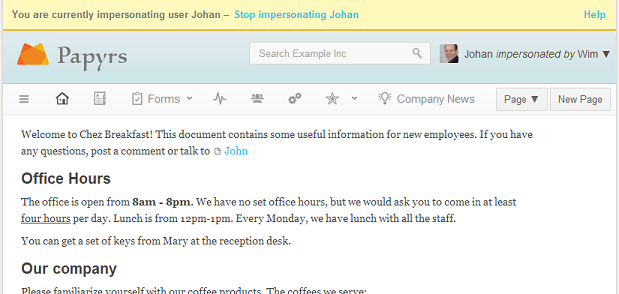
If your plan comes with the Admin Console, administrators can now impersonate other users in your account. This lets administrators view pages and settings as if they were another user. This can be useful to make sure the settings are correct, or to help a user with some question. As long as a user is impersonated, all actions are performed as this user (such as posting a comment, changing settings, etc.); to exit impersonation mode click “Stop Impersonating” in the yellow top bar.
More Theme options
Some extra theming options were added to the Theme Settings page:

  • Background Image
    Upload an image to use as the background image (instead of a flat background color).

  • Background & Banner Options
    When a background or banner image is set, it’s now possible to either repeat or hide the image. The “Repeat” option will horizontally and vertically repeat the image until it fills the banner or background area. This is especially useful if you’re using pattern images, for example. The Hide option allows you to (temporarily) not show the image, but use the background or banner background color instead.

  • Menubar Background Gradient color
    If this color is different from the menu bar background color, a gradient color is used on the menu bar (from the background color, to the background gradient color). Unfortunately old versions of Internet Explorer won’t support this, so users of those browsers will just see the menu bar background color.

We hope you like all the new features!
Papyrs Now Integrates With 150+ Web Services through Zapier!

Zapier is a great service that allows you to connect/sync between all kinds of web services. Best of all, it’s based on a concept we like a lot ourselves: simple drag & drop! Without any programming knowledge you can simply connect any of the – over 150 – services listed in their service directory. And today we’re happy to announce Papyrs is now one of them!

So how does it work? If you sign up for Zapier, you can start connecting Papyrs to other services, or the other way around. Zapier calls any integration between any two services a Zap. The possibilities are pretty much endless, but just to give you some ideas for example Zaps for Papyrs:

  • Post the text of a new email in GMail to a Papyrs page
  • Post a new Stripe charge to the Activity Stream
  • Post a message to a page when a new WordPress blog comment arrives
  • Post a HipChat message when a new Page is created
  • Create a page to which all new Facebook updates are automatically added
  • Post Tweets to the Activity Stream
  • Add a new Desk case to a Page
  • On a new GitHub commit, post a message to the Activity Stream

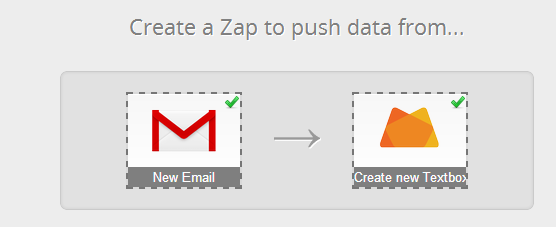
Let’s have a look at creating a Zap for the first example. Click on Create New Zap in your Zapier dashboard. Drag and drop the two services you want to connect. On the left side you drag a service which will trigger an action for the service you add to the right. We currently have a trigger for newly created pages, and actions to create a Textboxes and Headings on a Page and post new comments to the Activity Stream. We’re planning to add many more actions and triggers later on. For now, let’s set a new email in Gmail as the trigger (left), to create a new Textbox on a Papyrs page (right).

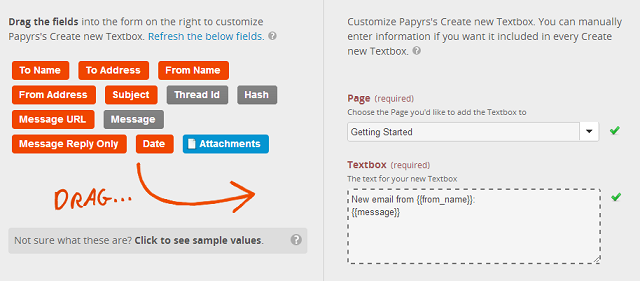
You need to enter your account information next. For Papyrs you need to enter your API key (go to Settings > Account in Papyrs to request one). Then, simply drag the fields from the email you want to add to the new Textbox.

That’s it. A new Textbox will now be added to the selected page once a new email arrives.

Go over to the Zapier.com home page and give it a spin (literally, the spinner shows you some examples of what’s possible).